Overview
Introduction
Projects are the core of the system, it manages quotes, but also all the follow-up reports related to a quote that becomes an order. Consequentely, it generates Purchase orders, Packing slips and Invoices too. Let’s take a look at the general interface and its subtabs.
Info
Info is the main subtab. It’s the place where we specify the customer, contact, salesperson, etc. It’s also where we’ll insert items inside as many sections we want to. In this example, I simply clicked on the New button (bottom left) and haven’t filled anything yet.
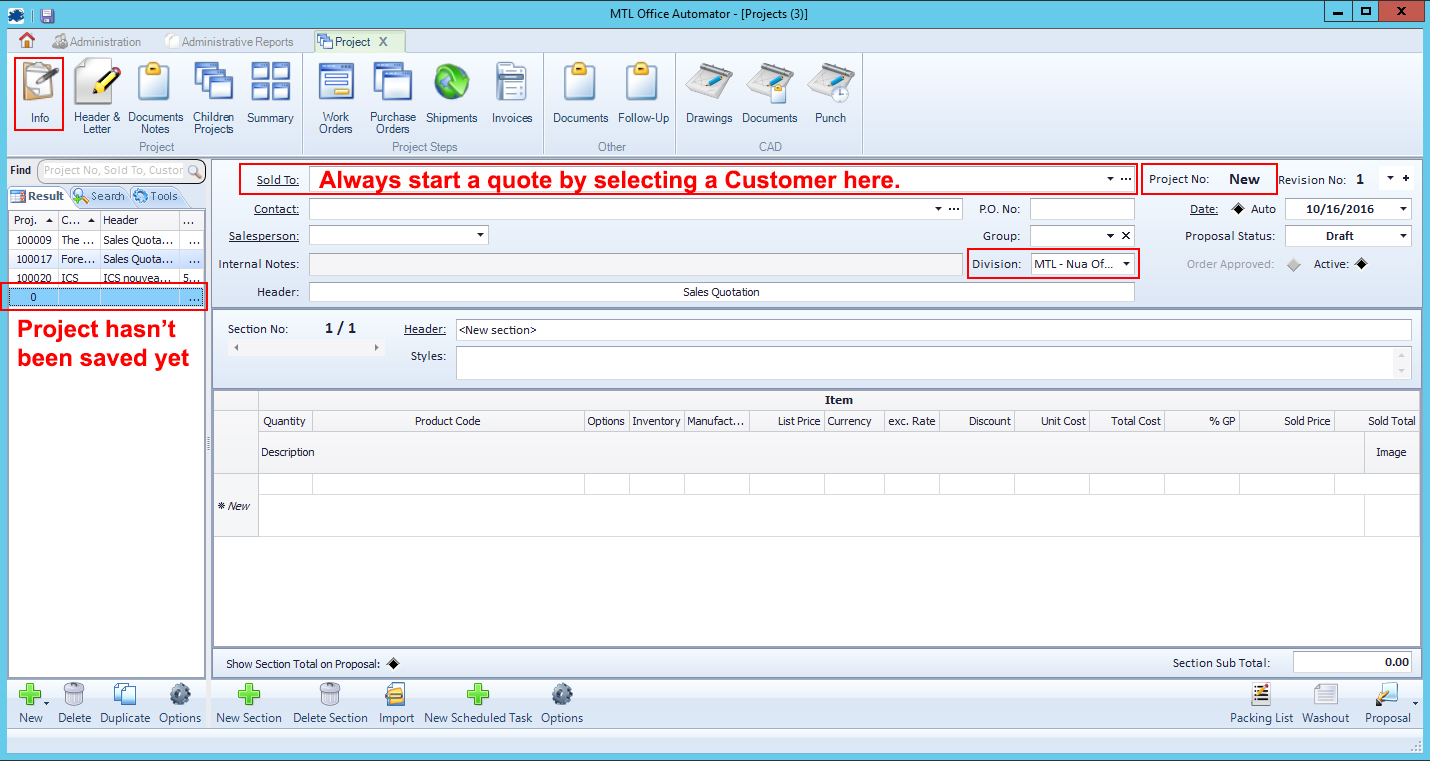
As you can read in the last snapshot, a new project that hasn’t been saved yet hasn’t a quote number yet.
In order to properly start your quote, you need to do the following first :
1. Select a customer in the Sold To menu.
2. Once you chose a customer, a contact and a salesperson will be automatically attributed.
You can change those default information whenever you want.
3. Don’t change the Division menu value (e.g.: MTL). Otherwise, you might not see your quote anymore, since most users don’t have the access to other company’s division. If you change this value by mistake, tell us so we can fix this.
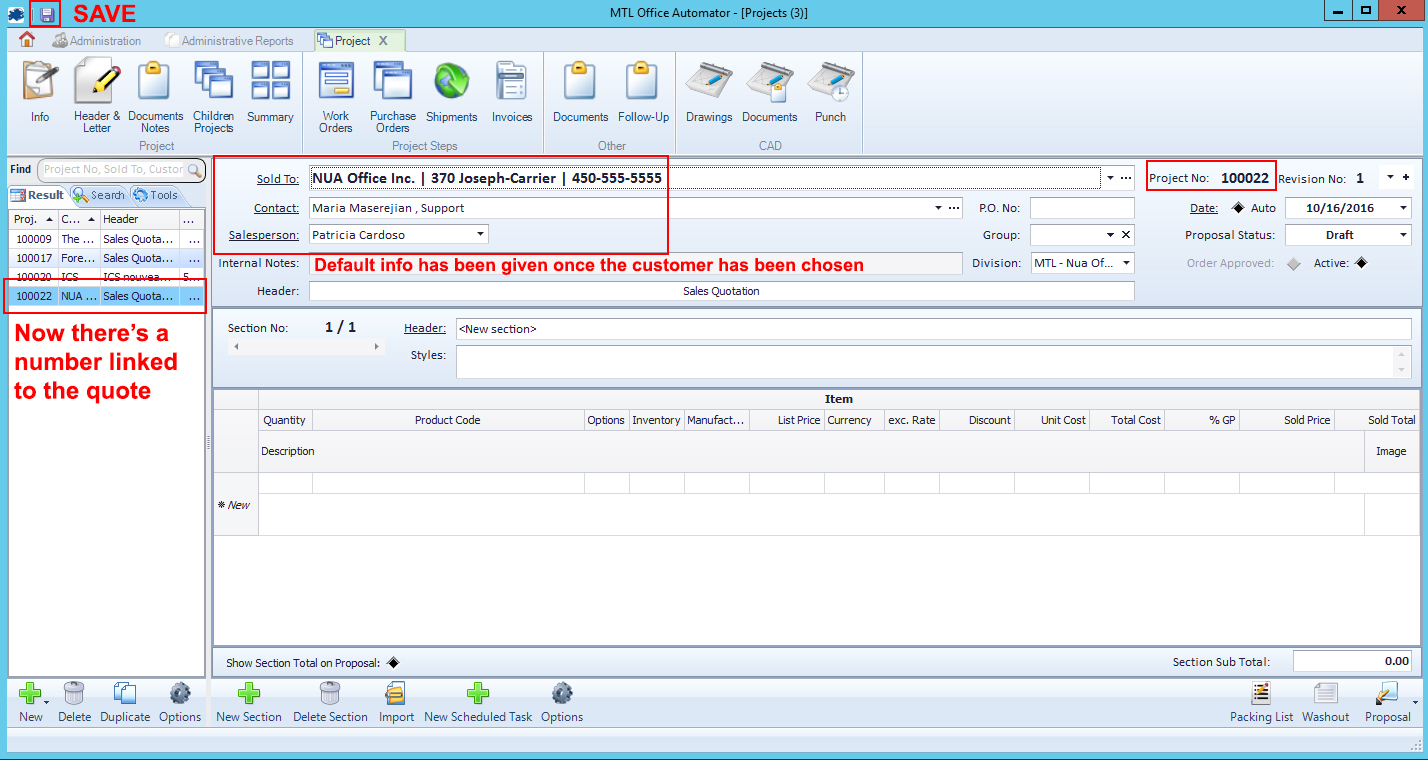
So we just chose a Customer, double-check if the Contact and Salesperson automatically attributed were good, then we saved.
The quote has now a number (#100022) and is physically saved in the system.
Starting the quote
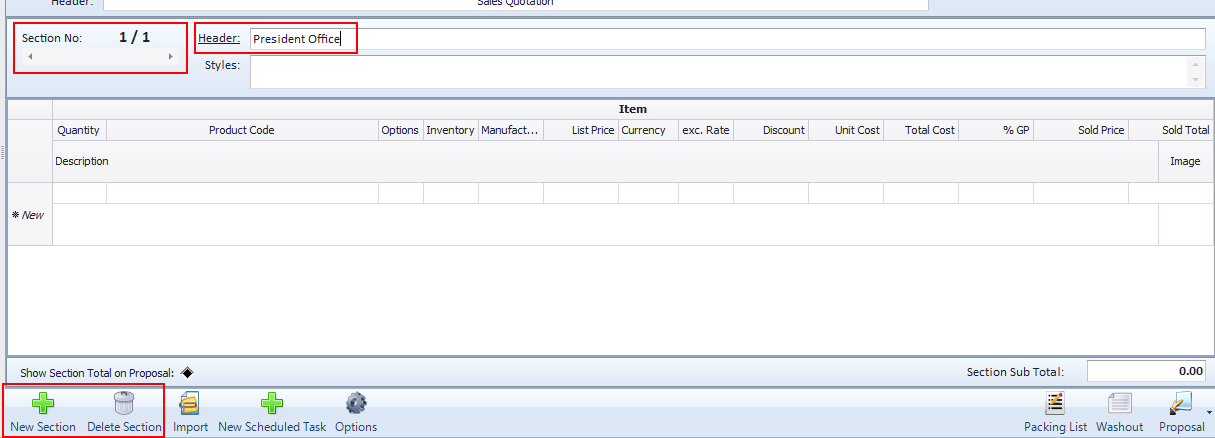
Now, let’s start our quote. By default, Automator has created a first section.
A section is just a way to split your quote into different parts to structure it a cleaner way on reports.
We just gave the name “President Office” to the first section.
We can create as many sections we want to and we can travel between sections using the horizontal scroll under “Section No: 1/1”.
Adding items
We’re now ready to add Items.
There is actually 3 ways. Please, refer to those following links to read more about those :
1. Using the catalog reader (based on Project Matrix)
2. Using the custom item field
3. Importing a SIF file from 2020 or Project Matrix
Now, let’s assume we inserted items and let’s continue our quote.
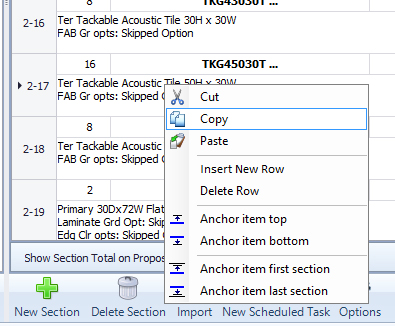
Copy, delete or move an item line
If you want to delete or copy an item, right-click on its line and choose the option you want.
If you want to re-order your item, click on its line item number (ex: 2-17) and drag-and-drop it wherever you want in the section.
Save, save, save.
Keep in mind Automator is a software and, like every app, it could crash. This is why it’s important to save from time to time to prevent loosing a big crunch of your quote. You just need to click on the disk located at the top left of the software.
Washout : Quote review
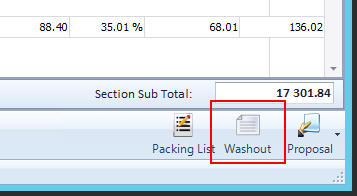
You think you’re ready to give your customer his quote ? Automator offers you a simple report that gives you a very detailed breakdown. It allows you to see average discounts and %GP for a single section or the whole quote. This tool is very useful to get a good overview of your sale discounts, profits and margins. To generate this review, click on the Washout button.
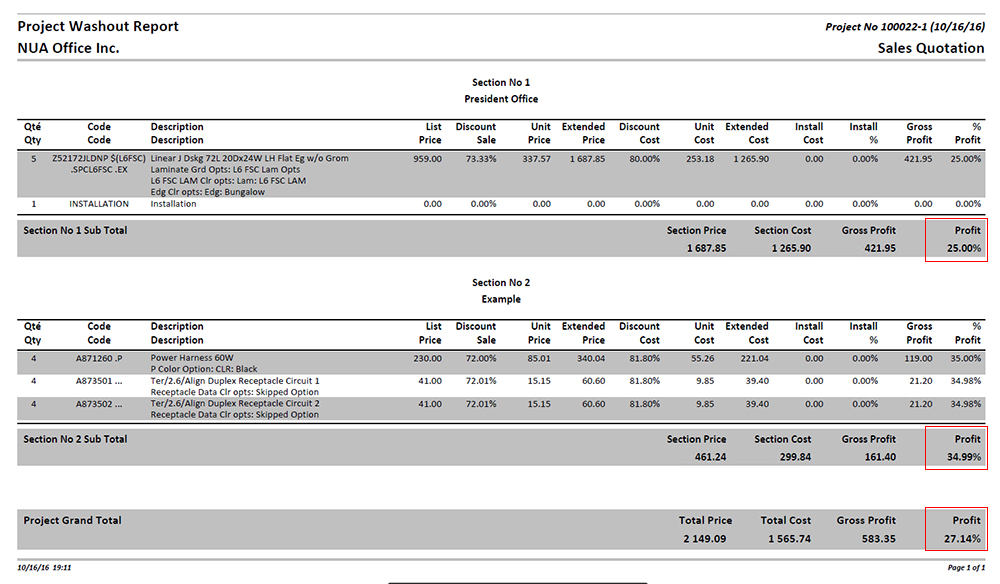
In this example, we can see the average %GP of the first section is 25%, the second one is 34.99%, for a total %GP of 27.14%. If we’re satisfied by the incoming results, then we’re ready to print and/or email our quote !
Quote report
Next to the Washout button we previously clicked on, there’s a Proposal button. Click on it to generate your quote report.
Once the report will be opened, you can review your quote the way your customer will see it. To print or send it by email, bring your mouse down the PDF viewer and a toolbar will appear. Click on the printer icon.
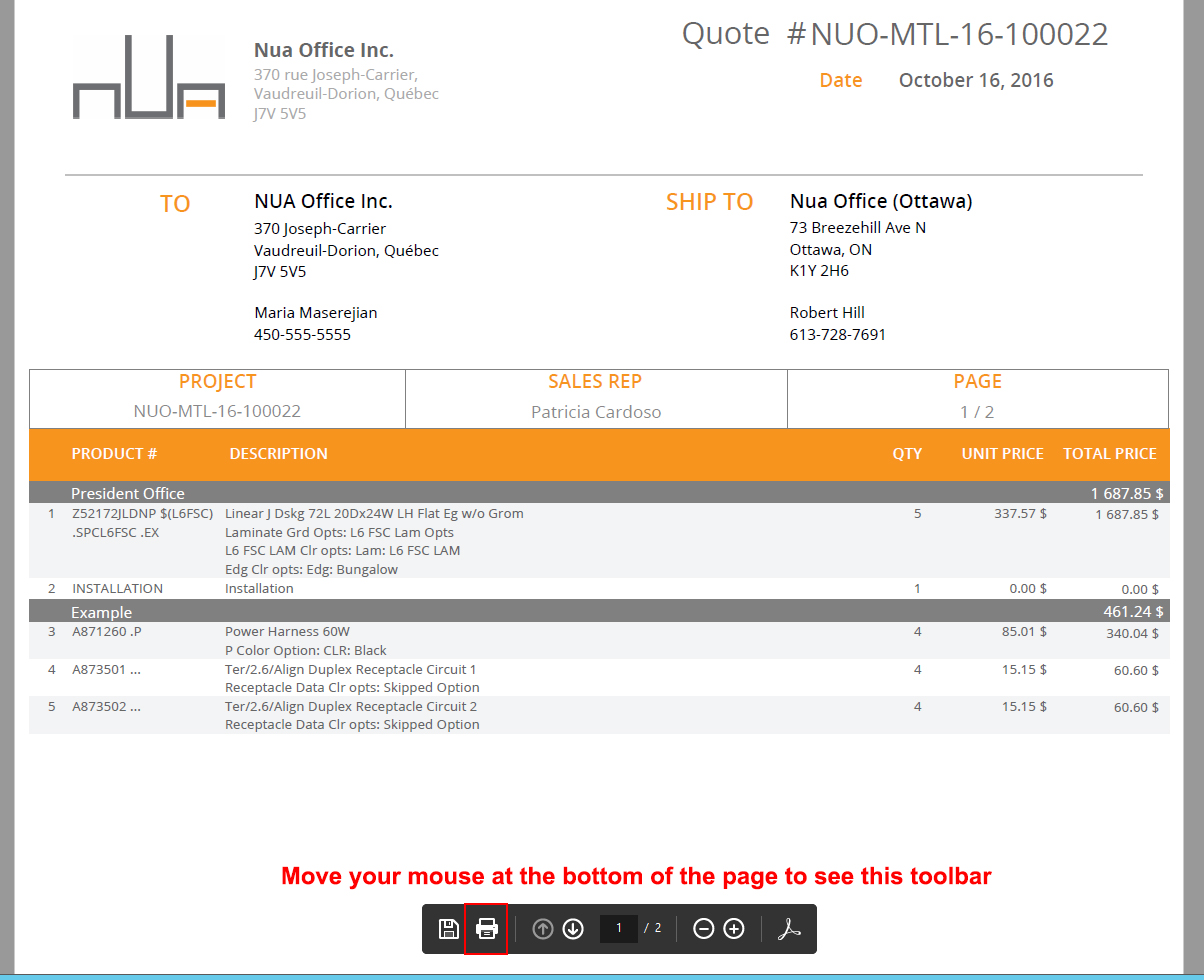
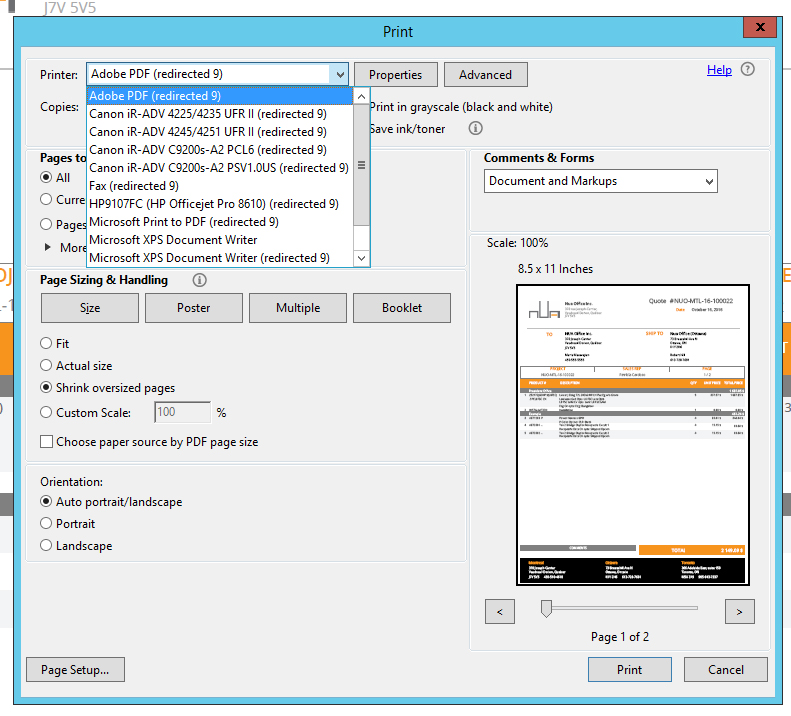
The printing box will open. In the Printer field, you’ll see all your local printers. Just choose the one you’d like to use for a print. If you want to send the quote by email, choose the PDF option, then click on Print.
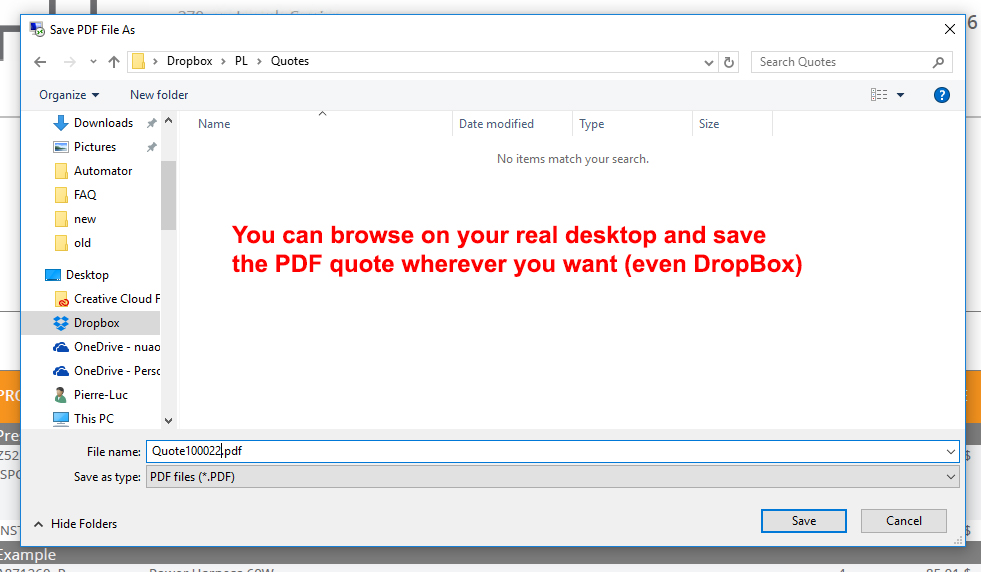
An Explorer window will open and will point on your local desktop. Browser to the location where you want to save your PDF report, then click on Save.
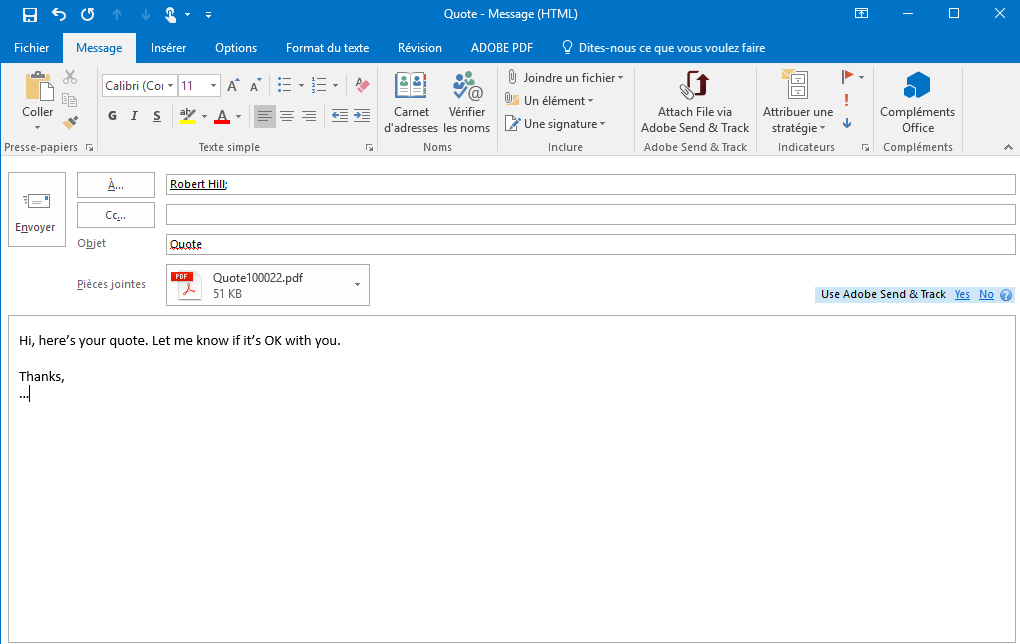
PDF Viewer will open on your local computer. Click on the mail icon and choose Attach to Email.
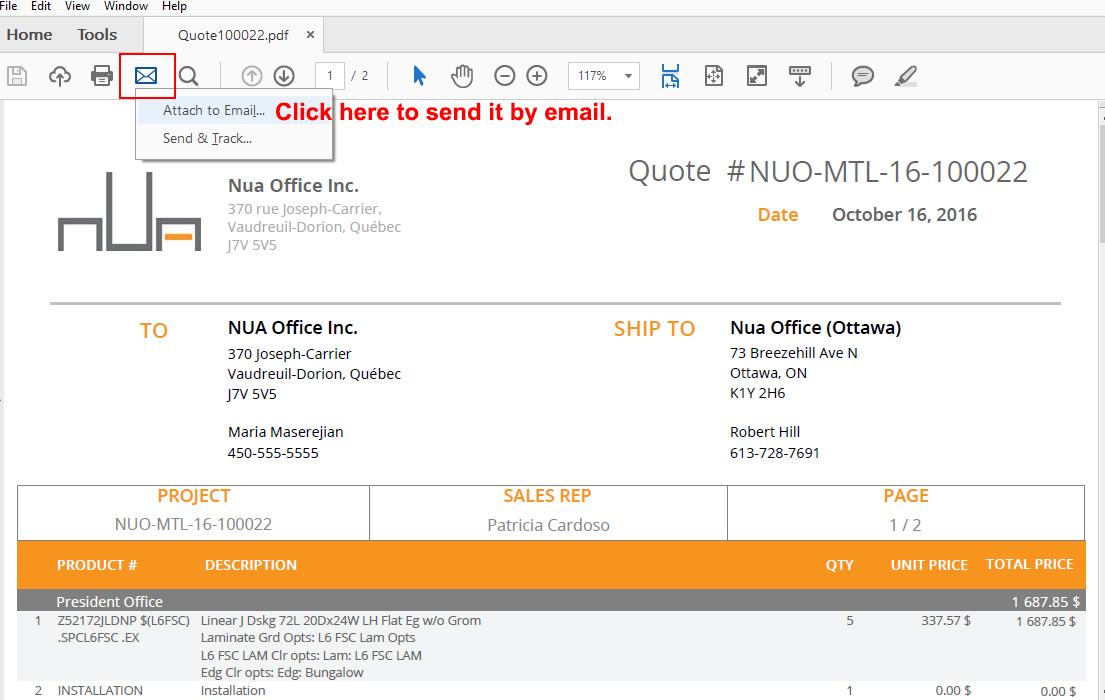
Outlook will open and automatically attach your file to the email. Enter the email address of your customer, a quick message and click on Send. Sorry for the french version of Outlook here !