Setup and Start Automator
Introduction
Automator is a software installed on an external Windows Server. This means each user has its own private windows remote session that is completely independant of their own computer. Let’s say that accessing Automator is a bit like going on another computer using TeamVieweror Log Me In.
How to open your Remote Desktop session
Step 1
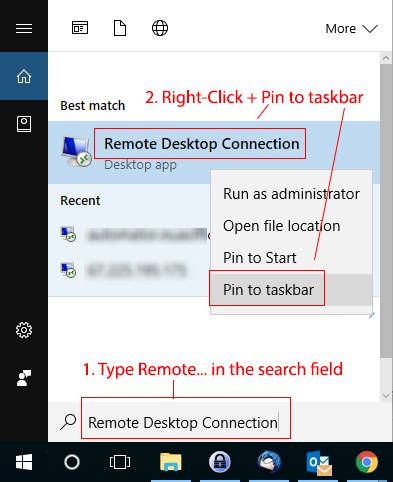
You must open the app Remote Desktop Connection (it’s natively installed on Windows). Open Remote Desktop Connection by clicking the Start button icon. In the search box, type Remote Desktop Connection, and then, in the list of results, click Remote Desktop Connection. *I suggest you to create a shortcut on the taskbar. Just right-click on the app icon and choose Pin to taskbar.
Step 2
Now you have the Remote Desktop Icon in your taskbar. Click on it.
![]()
Step 3
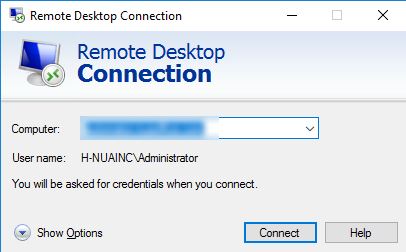
A box will pop up, asking your for a Computer. Enter automator.nuaffoce.com, then click on Connect.
Step 4
In the next box, enter your username and password, then click on OK.
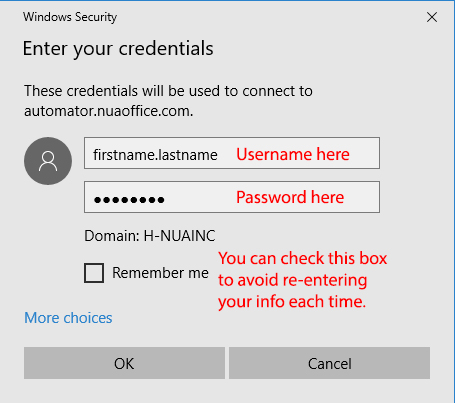
** NOTE : The first time you connect, your computer might ask you if you want to approve the security certificate of the Remote Server. Check the box Don’t ask me again… and click on Yes.

Step 5
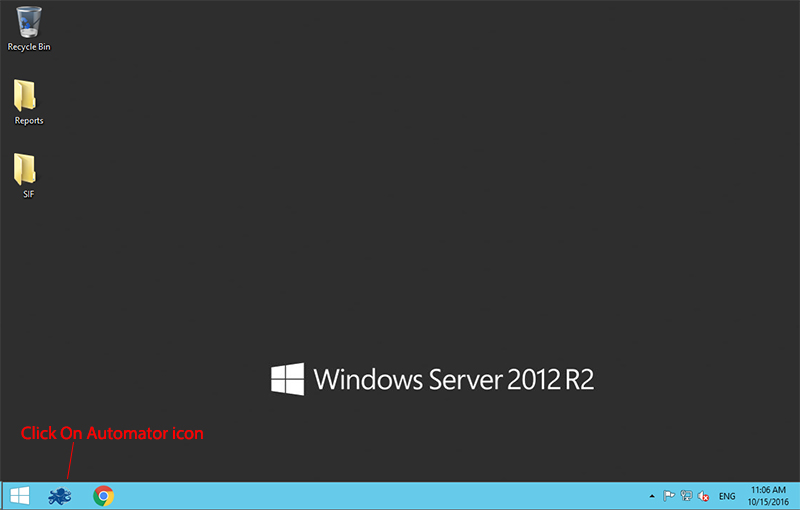
After few seconds of loading, your remote session will open. You’ll access a private remote desktop session. In the taskbar, click on Automator’s icon.
Step 6
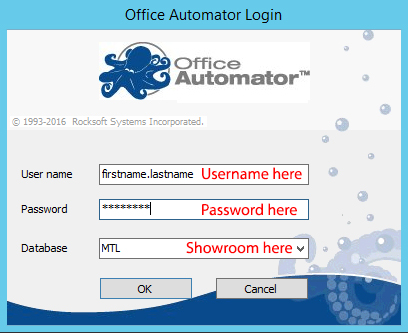
Re-enter your crendentials into the box that will pop up.
Step 7
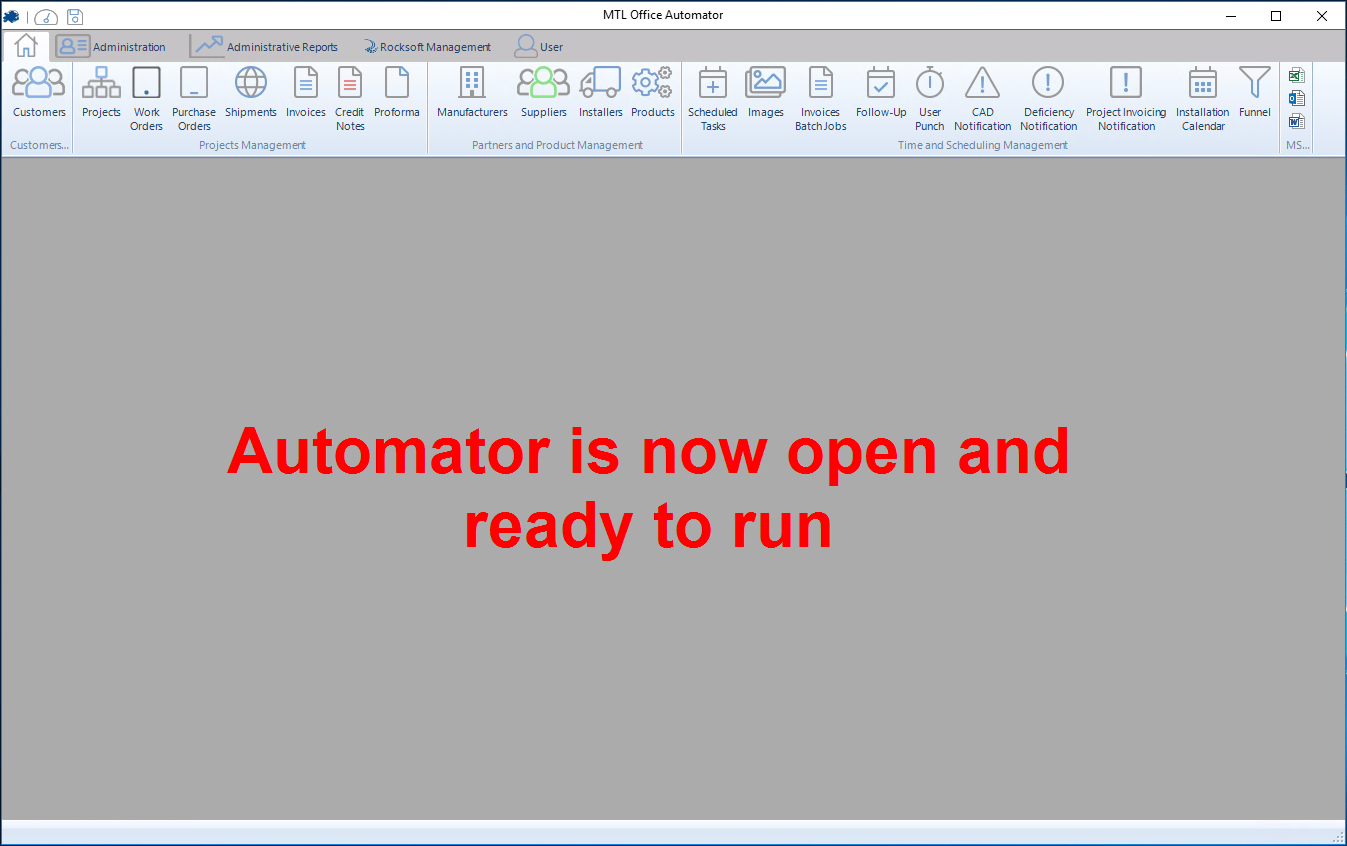
Automator is up and ready.